
Today I will teach how to fabricate crochet's LADYBIRDS . This model is pretty much in pieces with applications. When looking at the ready pet many imagine to be very difficult to do and end up giving up ... but it is very simple and quick to fabricate the ladybug , we will work ?
 - Anne wire in red
-Anne wire in black
-Crochet needle to 1.75mm
-Sewing needle
-Cola relief for fabric : Black and white
( If you want a larger ladybug use Duna wire for example ... )
01 - Start with 8 little chains and close with slip stitch .

02 - make 14 points and not finish with slip stitch. See the second image after the 14th lowest point we will start the second round already taking the two wires of the first point, we will work in a spiral without end ... always turns spiral, this way will shut and ends with only one low.


03 - Cut the wire, insert the needle through the initial hole and pull the left over to the inside.


04 - Finishing this first part of the piece , that looks like this:

05 - Now with black wire Anne'll make the head of the ladybug. Secure with low, circulate throughout the home ringlet with low dot ... not have to worry about making all 14 points, Then make the first round and not finish with slip stitch.


06 - Start the second round in second point down ... make one low point and jump down 1 point each spiral quickly it closes then forming the Ladybird little head.

07 - Cut the wire, insert the needle backwards and pull the yarn left then making the finish.


08 - is thus:

09 - With black wire pieces we make little antennas and ladybird legs. If you do not hand needle can use the crochet hook to pierce the same wire to each other's pet side as shown in the second image ... just pull the cord. Use glue emphasis on black fabric in fixing the little antennas and legs. To paste and pull the thread over to one side and pass the glue pull for each other and pass the glue and re-position the way that will stay ... so the glue will relief inside the piece making it very secure.


10 - Like the little antennas, is done the legs ... just noted that the legs are always localized the front of the animal. Do not go putting legs there in the Ladybird's butt


11 - To make the division of wings insert needle with thread in the center of the head coming out the back of the pet ... position the wire dividing well, tie, cut the thread and hide the remains inside the ladybug.


12 - Use relief glue to the flecks and eyes. The eyes are firmly centered more on top of the head ... since the flecks has a standard ... just leave pontinhando with own ink glass.
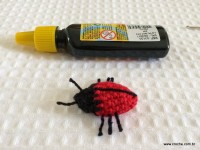

Now just wait a while for drying and the ladybug is ready !!!


SHoW!
ResponderExcluir